Let’s get started with another Tomcat chapter in this blog. Tomcat comes by default with the UserDatabaseRealm which is really crappy because it reads user info from tomcat-users.xml file and a Tomcat restart is needed for the changes to take effect. This is not appropriate for a production environment so we are going to authenticate against a MySQL database instead of the tomcat-users.xml file.
Continue reading
Tag Archives: Tomcat
Having two Tomcat JVMs
Let’s say you want to have two Tomcat JVMs running. How do we do it? It’s quite easy. We only need to copy some directories and modify the ports were we want Tomcat to run. We previously showed how to install Tomcat. Lets create the directory where we will make the new JVM run.
tomcat@debian:~$ mkdir /opt/tomcat/srva
tomcat@debian:~$
Now we copy the webapps, conf and bin directories to /opt/tomcat/srva and create some directories in /opt/tomcat/srva.
tomcat@debian:/opt/tomcat$ cp -R webapps/ /opt/tomcat/srva/
tomcat@debian:/opt/tomcat$ cp -R conf/ /opt/tomcat/srva/
tomcat@debian:/opt/tomcat$ cp -R bin/ /opt/tomcat/srva/
tomcat@debian:/opt/tomcat$ mkdir srva/logs srva/temp srva/shared srva/common srva/work
We are now going to change startup ports to 8081 instead of default 8080 in /opt/tomcat/conf/server.xml. Don’t forget the shutdown port too.
tomcat@debian:/opt/tomcat$ grep -i port srva/conf/server.xml
<Server port="8006" shutdown="SHUTDOWN">
  <!-- JMX Support for the Tomcat server. Documentation at /docs/non-existent.html -->
         Define a non-SSL HTTP/1.1 Connector on port 8080
    <Connector port="8081" protocol="HTTP/1.1"
               redirectPort="8444" />
               port="8080" protocol="HTTP/1.1"
               redirectPort="8443" />
    <!-- Define a SSL HTTP/1.1 Connector on port 8443
    <Connector port="8443" protocol="HTTP/1.1" SSLEnabled="true"
    <!-- Define an AJP 1.3 Connector on port 8009 -->
    <Connector port="8009" protocol="AJP/1.3" redirectPort="8443" />
    <!-- You should set jvmRoute to support load-balancing via AJP ie :
tomcat@debian:/opt/tomcat$
Now we need to define $CATALINA_BASE and $CATALINA_HOME. The way I did is by adding them to startup.sh in the srva/bin directory. Add the following to startup.sh.
CATALINA_HOME="/opt/tomcat/"
export CATALINA_HOME
CATALINA_BASE="/opt/tomcat/srva"
export CATALINA_BASE
JAVA_HOME="/opt/java"
export JAVA_HOME
We should now be ready to go. So lets get the party started.
tomcat@debian:/opt/tomcat$ echo "starting orig instance"; bin/startup.sh; echo "starting srva new instance"; srva/bin/startup.sh
starting orig instance
Using CATALINA_BASE:   /opt/tomcat
Using CATALINA_HOME:   /opt/tomcat
Using CATALINA_TMPDIR: /opt/tomcat/temp
Using JRE_HOME:        /opt/java
Using CLASSPATH:       /opt/tomcat/bin/bootstrap.jar
starting srva new instance
Using CATALINA_BASE:   /opt/tomcat/srva
Using CATALINA_HOME:   /opt/tomcat/
Using CATALINA_TMPDIR: /opt/tomcat/srva/temp
Using JRE_HOME:        /opt/java
Using CLASSPATH:       /opt/tomcat/srva/bin/tomcat-juli.jar:/opt/tomcat//bin/bootstrap.jar
tomcat@debian:/opt/tomcat$ ps auxwww | grep -i java | grep -v grep
tomcat    4759 10.4  1.3 1065228 50128 pts/0   Sl   12:37   0:03 /opt/java/bin/java -Djava.util.logging.config.file=/opt/tomcat
/conf/logging.properties -Djava.util.logging.manager=org.apache.juli.ClassLoaderLogManager -Djava.endorsed.dirs=/opt/tomcat/endorsed
-classpath /opt/tomcat/bin/bootstrap.jar -Dcatalina.base=/opt/tomcat -Dcatalina.home=/opt/tomcat -Djava.io.tmpdir=/opt/tomcat/temp
org.apache.catalina.startup.Bootstrap start
tomcat    4769 10.4  1.3 1064652 47872 pts/0   Sl   12:37   0:03 /opt/java/bin/java -Djava.util.logging.config.file=/opt/tomcat/srva/conf
/logging.properties -Djava.util.logging.manager=org.apache.juli.ClassLoaderLogManager -Djava.endorsed.dirs=/opt/tomcat//endorsed
-classpath /opt/tomcat/srva/bin/tomcat-juli.jar:/opt/tomcat//bin/bootstrap.jar -Dcatalina.base=/opt/tomcat/srva -Dcatalina.home=/opt
/tomcat/ -Djava.io.tmpdir=/opt/tomcat/srva/temp org.apache.catalina.startup.Bootstrap start
tomcat@debian:/opt/tomcat$
We see from the ps output that there are two java processes running. So lets check on what ports they are running. They should be on 8080 and 8081.
tomcat@debian:/opt/tomcat$ lsof -i :8080
COMMAND  PID   USER   FD   TYPE DEVICE SIZE NODE NAME
java    4759 tomcat   28u  IPv6  20974       TCP *:http-alt (LISTEN)
tomcat@debian:/opt/tomcat$ lsof -i :8081
COMMAND  PID   USER   FD   TYPE DEVICE SIZE NODE NAME
java    4769 tomcat   29u  IPv6  20980       TCP *:tproxy (LISTEN)
tomcat@debian:/opt/tomcat$
And this is the end of this how-to. As usual suggestions are always welcome.
Tomcat installation on GNU/Linux
Today I’m going to explain how to install Apache Tomcat on a Linux box. We should have a JDK already installed on the box. If that is not the case it can be downloaded from Sun website.
Now we download Tomcat from the website. Once downloaded we will download and install it into the /opt directory. We have to create the tomcat user.
$ sudo useradd -g tomcat -d /home/tomcat tomcat
$ sudo passwd tomcat
Now we have to define the $JAVA_HOME and $CATALINA_HOME variables. In /home/tomcat/.bashrc add the following:
export JAVA_HOME=/opt/java
export CATALINA_HOME=/opt/tomcat
Now change the ownership of /opt/tomcat directory, which is where we downloaded tomcat previously.
$ sudo chown -R tomcat:tomcat /opt/tomcat
We are now ready to start Tomcat. As tomcat user type:
$ /opt/tomcat/bin/startup.sh
If everything went well you shall now see tomcat process running.
tomcat@debian: /opt/tomcat/bin $ ps auxwww | grep -i java | grep -v grep
tomcat 6618 0.3 1.3 1064972 48260 pts/0 Sl 15:51 0:03 /opt/java/bin/java -Djava.util.logging.config.file=/opt/tomcat/conf/logging.properties -Djava.util.logging.manager=org.apache.juli.ClassLoaderLogManager -Djava.endorsed.dirs=/opt/tomcat/endorsed -classpath /opt/tomcat/bin/bootstrap.jar -Dcatalina.base=/opt/tomcat -Dcatalina.home=/opt/tomcat -Djava.io.tmpdir=/opt/tomcat/temp org.apache.catalina.startup.Bootstrap start
tomcat@debian: /opt/tomcat/bin $
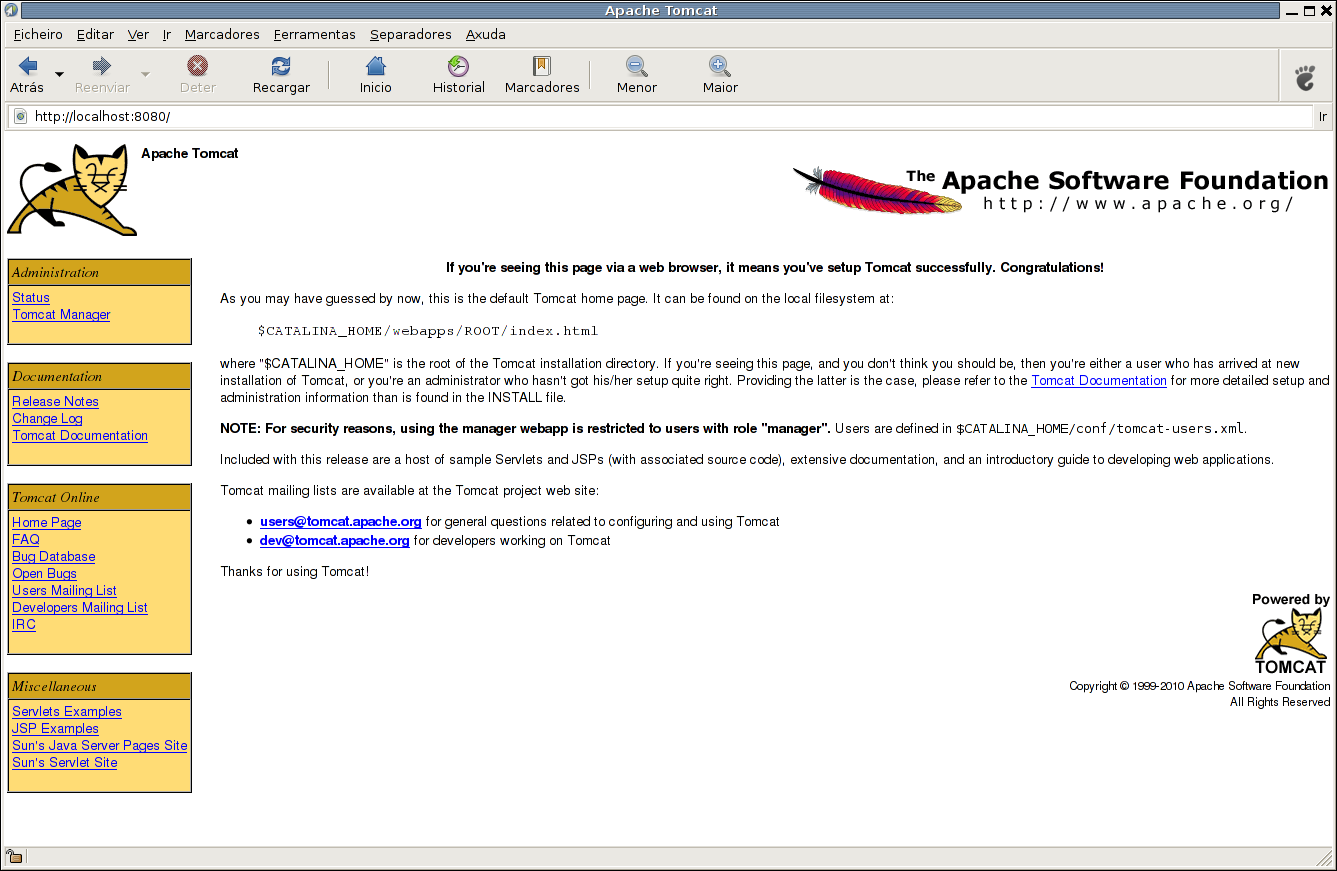
Now let’s see Tomcat on a browser. Hit http://localhost:8080/ and you shall see a page as the one below.
