Category Archives: UNIX

Posts regarding UNIX and Linux systems

Having two Tomcat JVMs

Let’s say you want to have two Tomcat JVMs running. How do we do it? It’s quite easy. We only need to copy some directories and modify the ports were we want Tomcat to run. We previously showed how to install Tomcat. Lets create the directory where we will make the new JVM run.

tomcat@debian:~$ mkdir /opt/tomcat/srva
tomcat@debian:~$

Now we copy the webapps, conf and bin directories to /opt/tomcat/srva and create some directories in /opt/tomcat/srva.

tomcat@debian:/opt/tomcat$ cp -R webapps/ /opt/tomcat/srva/
tomcat@debian:/opt/tomcat$ cp -R conf/ /opt/tomcat/srva/
tomcat@debian:/opt/tomcat$ cp -R bin/ /opt/tomcat/srva/
tomcat@debian:/opt/tomcat$ mkdir srva/logs srva/temp srva/shared srva/common srva/work

We are now going to change startup ports to 8081 instead of default 8080 in /opt/tomcat/conf/server.xml. Don’t forget the shutdown port too.

tomcat@debian:/opt/tomcat$ grep -i port srva/conf/server.xml 
<Server port="8006" shutdown="SHUTDOWN">
  <!-- JMX Support for the Tomcat server. Documentation at /docs/non-existent.html -->
         Define a non-SSL HTTP/1.1 Connector on port 8080
    <Connector port="8081" protocol="HTTP/1.1" 
               redirectPort="8444" />
               port="8080" protocol="HTTP/1.1" 
               redirectPort="8443" />
    <!-- Define a SSL HTTP/1.1 Connector on port 8443
    <Connector port="8443" protocol="HTTP/1.1" SSLEnabled="true"
    <!-- Define an AJP 1.3 Connector on port 8009 -->
    <Connector port="8009" protocol="AJP/1.3" redirectPort="8443" />
    <!-- You should set jvmRoute to support load-balancing via AJP ie :
tomcat@debian:/opt/tomcat$

Now we need to define $CATALINA_BASE and $CATALINA_HOME. The way I did is by adding them to startup.sh in the srva/bin directory. Add the following to startup.sh.

CATALINA_HOME="/opt/tomcat/"
export CATALINA_HOME
CATALINA_BASE="/opt/tomcat/srva"
export CATALINA_BASE
JAVA_HOME="/opt/java"
export JAVA_HOME

We should now be ready to go. So lets get the party started.

tomcat@debian:/opt/tomcat$ echo "starting orig instance"; bin/startup.sh; echo "starting srva new instance"; srva/bin/startup.sh
starting orig instance
Using CATALINA_BASE:   /opt/tomcat
Using CATALINA_HOME:   /opt/tomcat
Using CATALINA_TMPDIR: /opt/tomcat/temp
Using JRE_HOME:        /opt/java
Using CLASSPATH:       /opt/tomcat/bin/bootstrap.jar
starting srva new instance
Using CATALINA_BASE:   /opt/tomcat/srva
Using CATALINA_HOME:   /opt/tomcat/
Using CATALINA_TMPDIR: /opt/tomcat/srva/temp
Using JRE_HOME:        /opt/java
Using CLASSPATH:       /opt/tomcat/srva/bin/tomcat-juli.jar:/opt/tomcat//bin/bootstrap.jar
tomcat@debian:/opt/tomcat$ ps auxwww | grep -i java | grep -v grep
tomcat    4759 10.4  1.3 1065228 50128 pts/0   Sl   12:37   0:03 /opt/java/bin/java -Djava.util.logging.config.file=/opt/tomcat
/conf/logging.properties -Djava.util.logging.manager=org.apache.juli.ClassLoaderLogManager -Djava.endorsed.dirs=/opt/tomcat/endorsed 
-classpath /opt/tomcat/bin/bootstrap.jar -Dcatalina.base=/opt/tomcat -Dcatalina.home=/opt/tomcat -Djava.io.tmpdir=/opt/tomcat/temp 
org.apache.catalina.startup.Bootstrap start
tomcat    4769 10.4  1.3 1064652 47872 pts/0   Sl   12:37   0:03 /opt/java/bin/java -Djava.util.logging.config.file=/opt/tomcat/srva/conf
/logging.properties -Djava.util.logging.manager=org.apache.juli.ClassLoaderLogManager -Djava.endorsed.dirs=/opt/tomcat//endorsed 
-classpath /opt/tomcat/srva/bin/tomcat-juli.jar:/opt/tomcat//bin/bootstrap.jar -Dcatalina.base=/opt/tomcat/srva -Dcatalina.home=/opt
/tomcat/ -Djava.io.tmpdir=/opt/tomcat/srva/temp org.apache.catalina.startup.Bootstrap start
tomcat@debian:/opt/tomcat$

We see from the ps output that there are two java processes running. So lets check on what ports they are running. They should be on 8080 and 8081.

tomcat@debian:/opt/tomcat$ lsof -i :8080
COMMAND  PID   USER   FD   TYPE DEVICE SIZE NODE NAME
java    4759 tomcat   28u  IPv6  20974       TCP *:http-alt (LISTEN)
tomcat@debian:/opt/tomcat$ lsof -i :8081
COMMAND  PID   USER   FD   TYPE DEVICE SIZE NODE NAME
java    4769 tomcat   29u  IPv6  20980       TCP *:tproxy (LISTEN)
tomcat@debian:/opt/tomcat$

And this is the end of this how-to. As usual suggestions are always welcome.
Check your stocks with Perl

I wrote this small script to check the value of stocks with Perl. It doesn’t shows the value of the stock in the pre and post market, but it does its job.

     1  #!/usr/bin/perl -w
     2
     3  use strict;
     4  # Loading modules with use
     5  use LWP::UserAgent;
     6  use HTTP::Request;
     7  use HTML::Strip;
     8
     9  my $length = $#ARGV + 1;
    10  my $stock;
    11
    12  if ($length <= 0) {
    13          print "Usage: ./stock.pl ticker1 ticker2 .. tickern\n";
    14          exit 1 }
    15
    16  my $ua = LWP::UserAgent->new;
    17  #$ua->agent("Mozilla/4.0 (compatible; MSIE 5.0; Windows 98; DigExt)");
    18  $ua->agent("Perl Script checking stock value");
    19
    20  # Getting Google finance site website
    21  foreach $stock (0 .. $#ARGV) {
    22  my $url = "http://www.google.com/finance?q=$ARGV[$stock]";
    23  my $req = HTTP::Request->new(GET => $url);
    24  my $response = $ua->request($req);
    25  my $content = $response->content();
    26
    27  # Splitting the HTML code previously requested
    28  my @values = split(' ', $content);
    29  my @valor = grep(/ref_(\d+)_l/, @values);
    30
    31  foreach my $val (@valor) {
    32          # Using HTML::Strip to clean HTML tag
    33          my $hs = HTML::Strip->new();
    34          my $clean_text = $hs->parse( $val );
    35          $hs->eof;
    36          # Using split to remove > 
    37          my @value_2 = split(/\>/, $clean_text);
    38                  # Printing stock value after removing >
    39                  print "$ARGV[$stock] price is $value_2[1]\n"; 
    40    }
    41  }

Here is an usage example.

xavi@liberdade:/tmp$ ./stockparse.pl ge cat
ge price is 16.05
cat price is 69.72
xavi@liberdade:/tmp$ 

Suggestions are always welcome.

Wireless in Powerbook G4 part 2

Below is a small script to configure the network interfaces in the Powerbook. It will probably work in other Linux systems too, maybe some modifications would need to be made. wlan0 is the wireless interface and eth0 the broadband interface.


#!/bin/bash
PATH=/usr/local/sbin:/usr/local/bin:/sbin:/bin:/usr/sbin:/usr/bin

echo "Checking whether NetworkManager is running"
if [ -f /var/run/NetworkManager.pid ]; then
        echo "NetworkManager is running, stopping it"
        /etc/init.d/network-manager stop
else
        echo "NetworkManager is not running"
fi

Interface() {
echo "Choose the name of the interface you want to configure"
echo "1 = Interface ethernet eth0"
echo "2 = Interface wireless wlan0"
echo "0 = Quit the program"
echo
read INT

if [ $INT = 1 ]; then
ETH=eth0

elif [ $INT = 2 ]; then
ETH=wlan0 
echo "Choose the essid you want to connect to"
iwlist $ETH scan | grep -i essid
read ESSID
iwconfig $ETH "$ESSID"

elif [ $INT = 0 ]; then
echo "Quitting"
exit 0
fi
}

Interface

Configure() {
echo
echo " 1 = static "
echo " 2 = dhcp "
echo " 0 to quit the program "
echo
read CHOICE

static() {
echo "Write the IP of the interface"
read IP
echo "Write the network mask"
read NETMASK
echo "Write the default gateway"
read ROUTE
echo "Configuraning the interface"
ifconfig $ETH $IP netmask $NETMASK
echo "Configuraning the gateway"
route add default gw $ROUTE
echo "search" > /etc/resolv.conf
echo "Write the IP of the first DNS server"
read DNS_1
echo nameserver $DNS_1 >> /etc/resolv.conf
echo "Write the IP of your second DNS server"
read DNS_2
echo nameserver $DNS_2 >> /etc/resolv.conf
} 

dhcp() {
        dhclient $ETH
        }

if [ $CHOICE = 1 ]; then
static

elif [ $CHOICE = 2 ]; then
dhcp

elif [ $CHOICE = 0 ]; then
echo "Quitting the program."
exit 0
fi
}

Configure

exit 0

Suggestions are always welcome. 🙂

Wireless in Powerbook G4

I have an old Powerbook G4 12 inch running Debian. I had issues connecting to the wireless if I was not using Gnome. I found out it was because of Network Manager. While Network Manager is running I can not connect to the wireless network from command line. Currently I am using OpenBox so it doesn’t connect automatically to the wireless. Here is a small howto.

First we check module b43 is installed.

[19:16:50] xavi@NewYork:/tmp $ sudo modinfo b43
filename:       /lib/modules/2.6.30-2-powerpc/kernel/drivers/net/wireless/b43/b43.ko
firmware:       FW13
license:        GPL
author:         Michael Buesch
author:         Stefano Brivio
author:         Martin Langer
description:    Broadcom B43 wireless driver
alias:          pcmcia:m02D0c0448f*fn*pfn*pa*pb*pc*pd*
alias:          ssb:v4243id0812rev10*
alias:          ssb:v4243id0812rev0F*
alias:          ssb:v4243id0812rev0D*
alias:          ssb:v4243id0812rev0B*
alias:          ssb:v4243id0812rev0A*
alias:          ssb:v4243id0812rev09*
alias:          ssb:v4243id0812rev07*
alias:          ssb:v4243id0812rev06*
alias:          ssb:v4243id0812rev05*
depends:        pcmcia,mac80211,ssb,input-polldev,pcmcia_core,rfkill,rng-core,cfg80211
vermagic:       2.6.30-2-powerpc mod_unload modversions 
parm:           bad_frames_preempt:enable(1) / disable(0) Bad Frames Preemption (int)
parm:           fwpostfix:Postfix for the .fw files to load. (string)
parm:           hwpctl:Enable hardware-side power control (default off) (int)
parm:           nohwcrypt:Disable hardware encryption. (int)
parm:           qos:Enable QOS support (default on) (int)
parm:           btcoex:Enable Bluetooth coexistance (default on) (int)
parm:           verbose:Log message verbosity: 0=error, 1=warn, 2=info(default), 3=debug (int)
[19:16:54] xavi@NewYork:/tmp $ lsmod | grep -i b43
b43                   138992  0 
rfkill                 15184  3 rfkill_input,b43
rng_core                7952  1 b43
mac80211              178904  1 b43
cfg80211               72376  2 b43,mac80211
input_polldev           7836  2 b43,ams
ssb                    51292  1 b43
pcmcia                 32336  2 b43,ssb
pcmcia_core            40868  3 b43,ssb,pcmcia
[19:17:09] xavi@NewYork:/tmp $ 

Stop Network Manager

bash$ sudo /etc/init.d/network-manager stop

Bring up wireless interface. Wlan0 in my case.

bash$ sudo ifconfig wlan0 up

Scan the available wireless networks.

bash$ sudo iwconfig wlan0 scanning

Connect to the ESSID

bash$ sudo iwconfig wlan0 essid

Get an IP from the wireless access point.

bash$ sudo dhclient wlan0 

Ping an external address to see you are connected to the internet.

[19:31:57] xavi@NewYork:/tmp $ !ping
ping -c 3 debian.org
PING debian.org (194.109.137.218) 56(84) bytes of data.
64 bytes from klecker.debian.org (194.109.137.218): icmp_req=1 ttl=50 time=119 ms
64 bytes from klecker.debian.org (194.109.137.218): icmp_req=2 ttl=50 time=116 ms
64 bytes from klecker.debian.org (194.109.137.218): icmp_req=3 ttl=50 time=101 ms

--- debian.org ping statistics ---
3 packets transmitted, 3 received, 0% packet loss, time 2002ms
rtt min/avg/max/mdev = 101.768/112.858/119.928/7.940 ms
[19:32:02] xavi@NewYork:/tmp $ 

You should now be ready to go. I will write more on this later on.

Tomcat installation on GNU/Linux

Today I’m going to explain how to install Apache Tomcat on a Linux box. We should have a JDK already installed on the box. If that is not the case it can be downloaded from Sun website.

Now we download Tomcat from the website. Once downloaded we will download and install it into the /opt directory. We have to create the tomcat user.

$ sudo useradd -g tomcat -d /home/tomcat tomcat
$ sudo passwd tomcat

Now we have to define the $JAVA_HOME and $CATALINA_HOME variables. In /home/tomcat/.bashrc add the following:

export JAVA_HOME=/opt/java
export CATALINA_HOME=/opt/tomcat

Now change the ownership of /opt/tomcat directory, which is where we downloaded tomcat previously.

$ sudo chown -R tomcat:tomcat /opt/tomcat

We are now ready to start Tomcat. As tomcat user type:

$ /opt/tomcat/bin/startup.sh

If everything went well you shall now see tomcat process running.

tomcat@debian: /opt/tomcat/bin $ ps auxwww | grep -i java | grep -v grep
tomcat 6618 0.3 1.3 1064972 48260 pts/0 Sl 15:51 0:03 /opt/java/bin/java -Djava.util.logging.config.file=/opt/tomcat/conf/logging.properties -Djava.util.logging.manager=org.apache.juli.ClassLoaderLogManager -Djava.endorsed.dirs=/opt/tomcat/endorsed -classpath /opt/tomcat/bin/bootstrap.jar -Dcatalina.base=/opt/tomcat -Dcatalina.home=/opt/tomcat -Djava.io.tmpdir=/opt/tomcat/temp org.apache.catalina.startup.Bootstrap start
tomcat@debian: /opt/tomcat/bin $

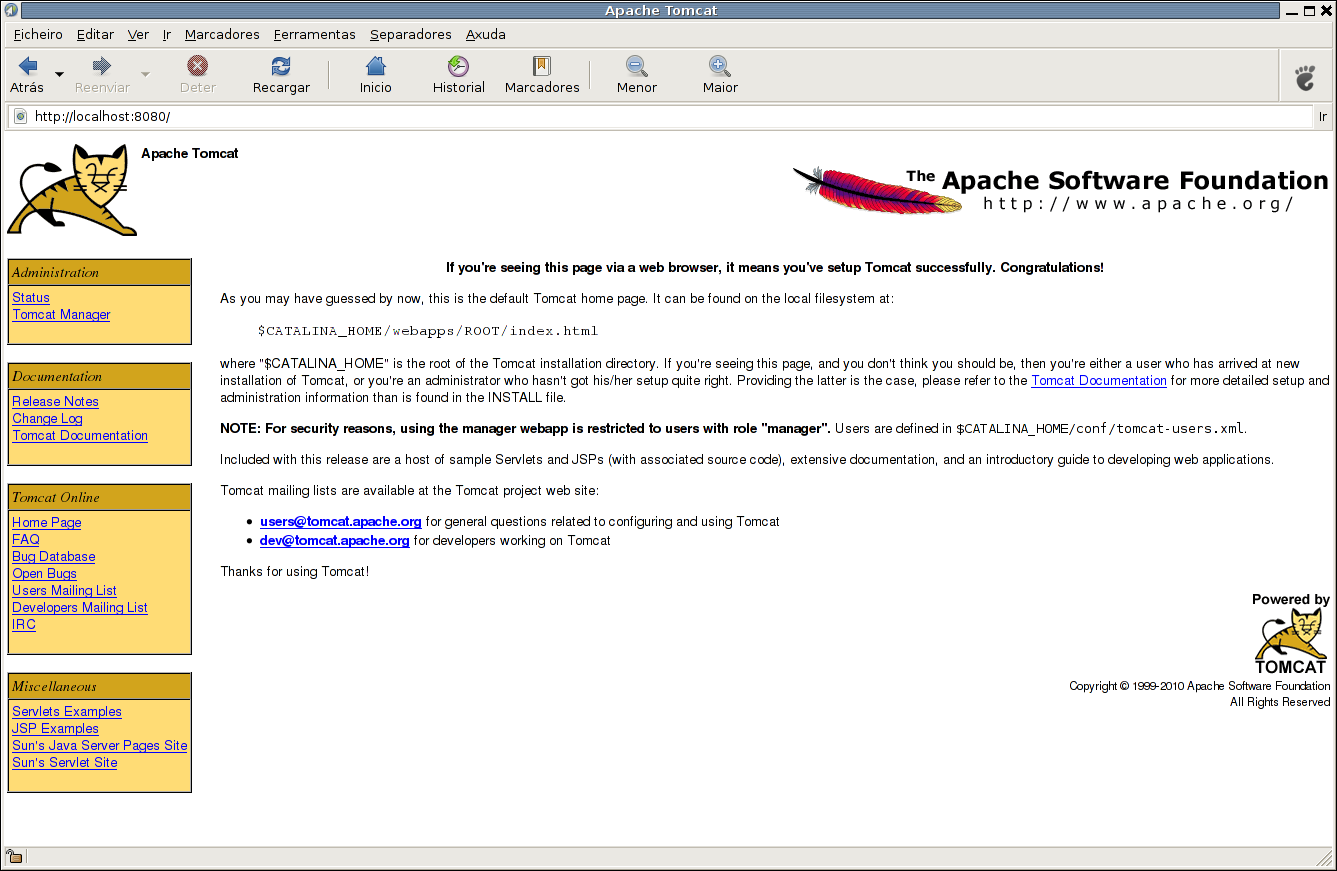
Now let’s see Tomcat on a browser. Hit http://localhost:8080/ and you shall see a page as the one below.